前言
現在工作幾乎都隨時用 Notion 進行筆記,雖然方便但是要分享到自己的網站上,還是需要手動複製貼上內容再進行發佈,這過程久了實在很麻煩,畢竟我不是隨時都在寫文章,一直想著如果可以在 Notion 上寫好筆記,簡單整理一下然後按發佈就好了XD,於是抱著這想法查了一下,發現已經有許多大神造好輪子XD,其中看最久的是這篇文章,會看這篇主要原因是他的整體構想比較接近我要的,另一方面他使用 Python 來轉出 Markdown,感覺我比較有機會實做出來,只是他是利用 hugo 去建構靜態網站,而我主要都是用 WordPress…
想了很久決定來用 Hugo 先進行實作,但當我真的想做之後發現文章中所使用的自動化平台 automate.io 已經要停止服務了…,所以我又擱置一段時間,然後花了許多時間去弄出 Hugo,弄出來之後又停擺一段時間,因為我不太懂 CI/CD,也不懂 Github Action Workflow 的機制,雖然真的要找資料理解並實作不難,但我很懶,之前 Hugo 花太多時間惹…,而且搞到現在其實也還沒完成,所以應該還會有下篇文章XD
PS. 沒意外,這篇會隨著下一篇文章隨時修改,等真的完成會在整合成一篇貼到我的主力 WordPress。
思路
這裡工作在於如何建立自動部署平台
整體工作流程分為兩個專案進行,這兩個專案會利用 Zapier 去觸發彼此動作
-
Notion Database → Convert Markdown → Hugo Repo => 轉換 Notion 文章
-
Hugo Repo → Github Action → Public Page Repo => 自動佈署靜態網站的平台
這篇主要是放在 2.如何建立自動佈署靜態網站的平台,因為第 1 點還沒開始做XD
相關工具及平台
-
Notion (測試 zapier 觸發 github action 建立 issue)
-
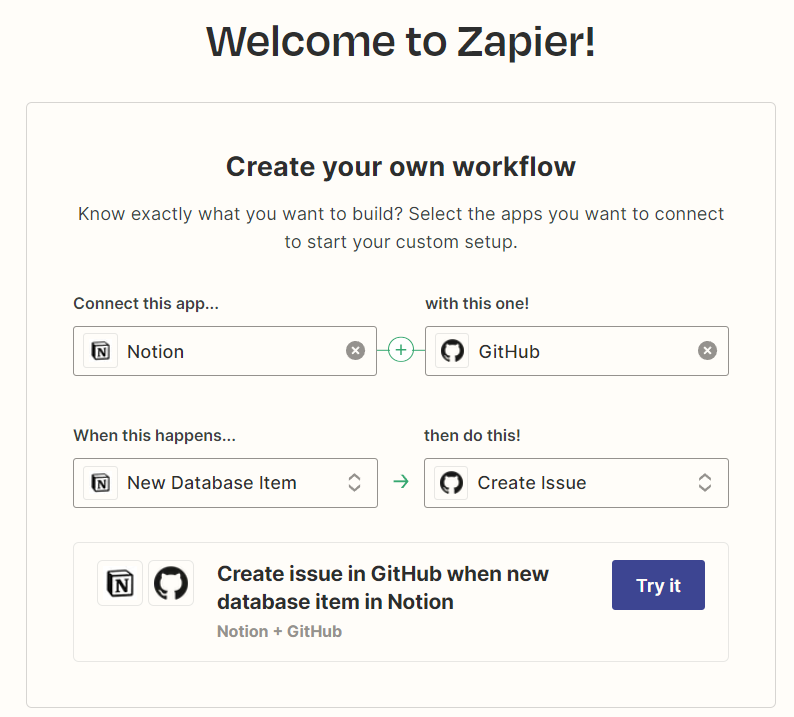
Zapier (自動化平台,連接 Notion 跟 Github 的橋樑)
-
Github Workflow (action,佈署靜態網站到指定專案)
Notion Database → Convert Markdown → Hugo Repo
一、建立 Notion Database
-
Name (title): 文章標題
-
Article (text): 文章鏈接
-
MDFilename (text): 創建的 markdown 文件名
-
Category (select): 文章分類
-
Tags (multi_select): 文章標籤
-
IsPublish (checkbox): 文章是否發佈
-
NeedUpdate (checkbox): 文章是否有更新
-
CreateAt (Created time): 創建時間
-
UpdateAt (Last edited time): 更新時間
二、設定 Notion API https://www.notion.so/my-integrations
三、API 設定完之後還要去 Share Notion Database
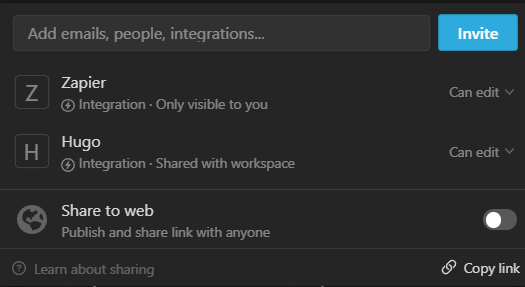
四、設定 zapier:連接 github issue
Hugo Repo → Github Action → Public Page Repo
一、建立 Github 儲存庫
這我就不說了,方法有好幾種,有空再看要不要整理我自己建立 repo 的方式XD 這個儲存庫就是存放你的 Hugo 專案內容
二、新增 Secrets
-
Notion API Token
-
Github Token (可到GITHUB設定)
-
Git user.email、user.name
三、Github Action file:hugo-auto-pubish.yml
收到新的 issue 就會自動啟用 peaceiris/actions-hugo@v2 產生靜態檔案並複製到另一個公開網頁專案的 Action
關鍵功能:
-
actions/checkout@v3: Github 儲存庫操作
-
peaceiris/actions-hugo@v2: 別人寫的 Hugo Action
# This is a basic workflow to help you get started with Actions

name: Hugo auto publish

# Controls when the workflow will run
on:
  # Triggers the workflow on push or pull request events but only for the "main" branch
  issues:
    types: [opened]

  # Allows you to run this workflow manually from the Actions tab
  workflow_dispatch:

# A workflow run is made up of one or more jobs that can run sequentially or in parallel
jobs:
  # This workflow contains a single job called "build"
  build:
    # The type of runner that the job will run on
    runs-on: ubuntu-latest

    # Steps represent a sequence of tasks that will be executed as part of the job
    steps:
       # 使用當前的 repo
       - name: checkout private repo
         uses: actions/checkout@v3
         with:
          # 因為目前的 repo 有使用到 submodule,所以 submodule 也要一併同步
          # 不然原本的 repo 是沒有 submodule 的內容
          submodules: true
          token: ${{ secrets.CHECKOUT_TOKEN }}

       # 我的公開網站是放置在另一個 repo 所以這裡也要 clone 一份下來處理
       # 因為我 Hugo 預設是產生檔案到 public 資料夾,所以這邊我也是 clone 到那裡
       - name: checkout public repo
         uses: actions/checkout@v3
         with:
          # 這裡是那個網站在 github 上的 repo 名稱
          repository: jacky10001/test_action
          path: public
          # 記得去產生一把 personal access token 放到 repo 的 secrets 裡
          # 然後我 secrets 裡的名稱就叫 GITHUB_PAT,用別的名稱的話記得改掉
          # 參考 https://help.github.com/en/actions/automating-your-workflow-with-github-actions/authenticating-with-the-github_token
          token: ${{ secrets.CHECKOUT_TOKEN }}

       # 使用別人做好的 Hugo Actions
       - name: setup hugo
         uses: peaceiris/actions-hugo@v2
         with:
           hugo-version: latest
           extended: true

       # 開始用 Hugo 產生檔案囉
       - name: build content to public site
         working-directory: ./
         # --cleanDestinationDir 清除舊檔案
         run: hugo --minify --gc --cleanDestinationDir

       # 將檔案 commit 到 網站 repo
       - name: deploy and publish updates
         working-directory: ./public
         # user.email 還有 user.name 可以取自己喜歡的,一定要設定不然會出錯
         run: |
           # 當 git 有更動時才進行動作
           if [[ `git status --porcelain` ]]; then
             git config --local user.email ${{ secrets.GIT_EMAIL }}
             git config --local user.name ${{ secrets.GIT_USER }}
             git add . -A
             git commit -m "[chore] Auto publish"
             git push origin
           else
             echo "content no changes"
           fi